





- Posted by:
- Posted on:
- Category:
BeamNG.driveBeamNG.drive - System:
Unknown - Price:
USD 0
Overview
Photomode allows players to take spectacular screenshots of the game, with the ability to adjust various graphical and camera settings to get the best look.
You can open Photomode by pressing ESC and selecting on the menu on top.
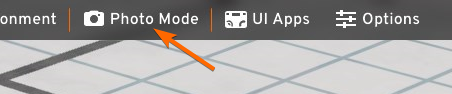
Camera
When enabling Photomode, smooth free camera is enabled.
The controls are the same as for the standard free camera.
Binding
Right Mouse Button + Mouse Movement
Interface
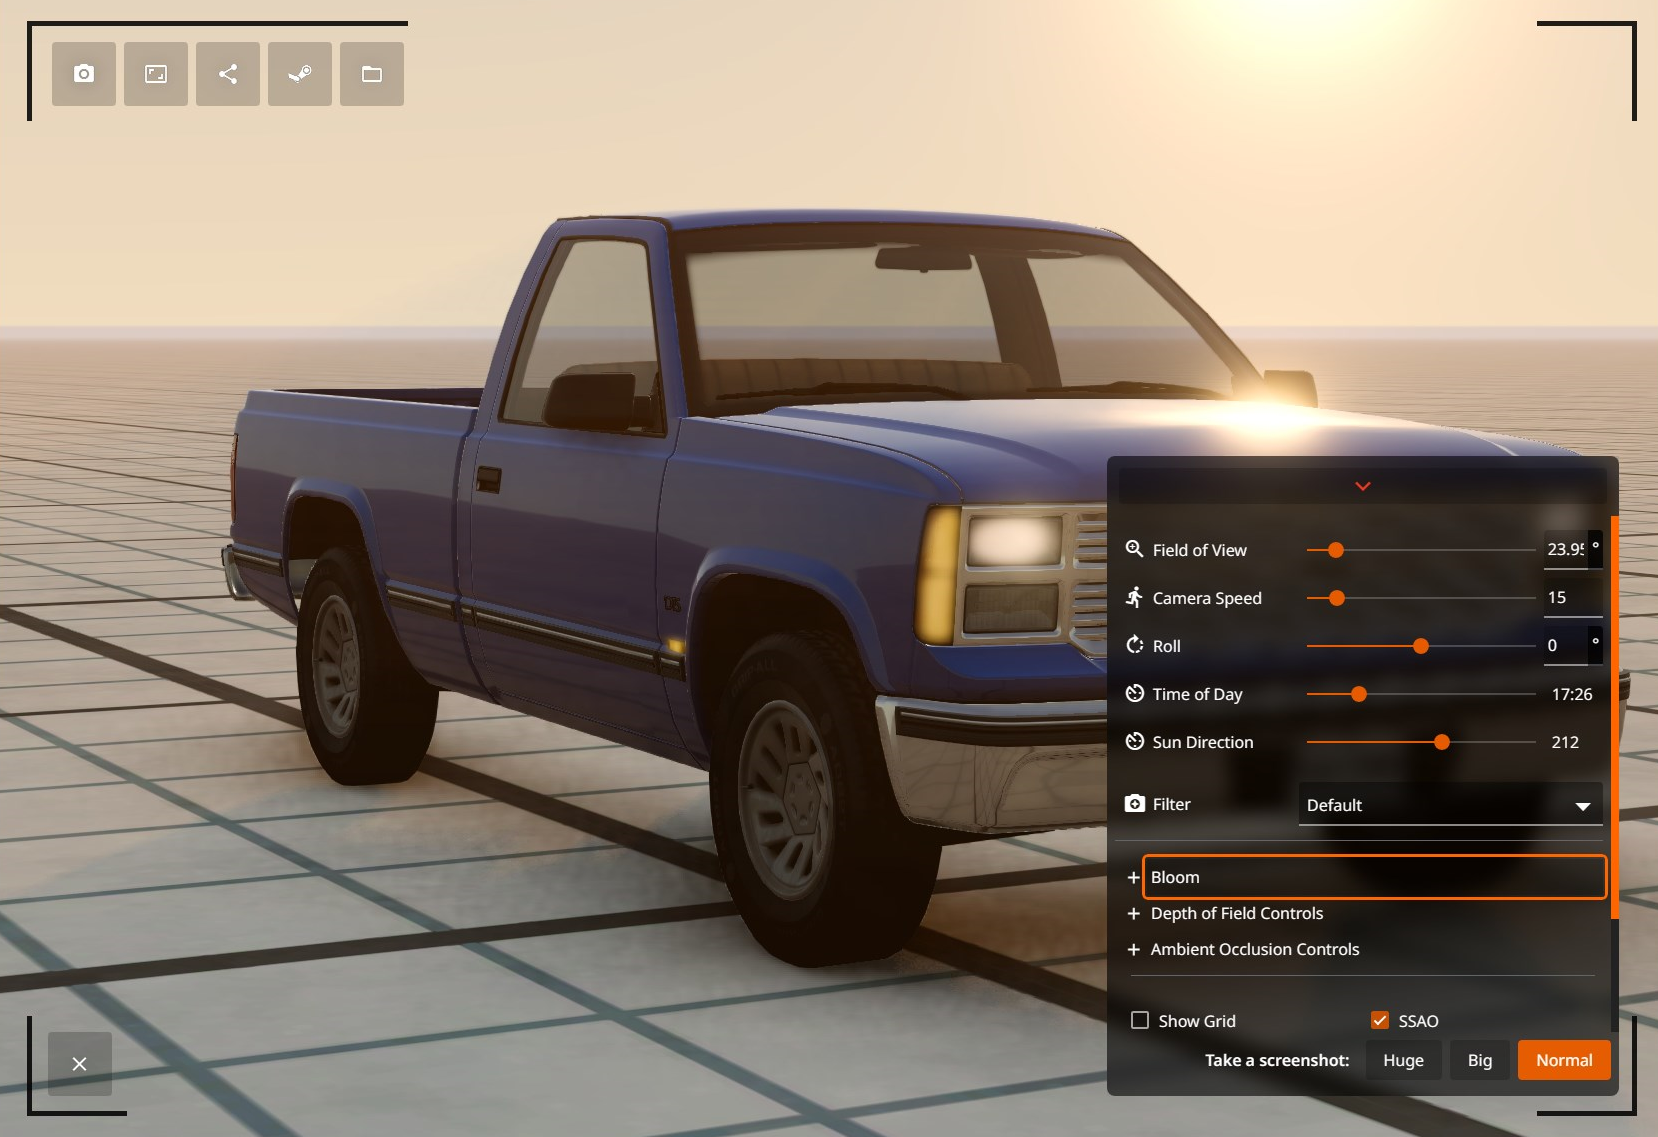
The Photomode interface is divided into multiple sections.
- On the top left corner are buttons to take screenshots in various ways:
- Take a screenshot
- Take a big screenshot (approximately x4 the resolution)
- Take a Steam screenshot
- Take a screenshot and upload it to the BeamNG server
- In the bottom right corner is the Photomode settings’ panel. Here you can find located all the settings, such as:
- Camera settings (Field of View, Speed, Roll)
- Time of Day and Sun Direction
- Filters
- Bloom, Depth of Field and Ambient Occlusion Controls
- Post Effects toggles and settings
- On the bottom left corner is a button to exit Photomode
All changes are temporary, and are reset when leaving Photomode.
Issues
PostFX settings weren’t reset
Closing the game abruptly while in Photomode may not reset the parameters properly. In this case, use the Reset PostFX Settings button located in Options -> Graphics to force reset those.
Game is frozen
This usually happens when you take a Huge screenshot. This produces intensive load on your PC. Please wait.
Tips & Tricks
- Photomode is a powerful tool not only for screenshots.
Recording clips can take advantage of the Photomode settings and smoothed camera by just hiding the User Interface - Access Photomode while using the Path Camera tool to be able to access its features
Shortcuts
Some useful default shortcuts are:
Action
Take normal screenshot
Action
Take big screenshot (up to 8K)
Binding
ALT + Mouse Wheel
Action
Change camera speed
Action
Double camera speed
Action
Toggle User Interface
Binding
SHIFT + Page Up/Down
Custom Filters
The filters relies on the Color Correction Ramps PostFX features, and can the selection can be easily expanded with custom made ones. An image editing software is required (Gimp, Krita, Photoshop, etc.)
- Take a screenshot of the game and open it in your image editing softare
- Add
BeamNG.drive\gameengine.zip\art\postfx\default_color_ramp.pngto your image, in a new layer - Use the Color Curve adjustments to do your changes
- When you are happy with the changes, export the color ramp with the color curve applied. Name it as you wish.
- Move the file to your user folder and place it inside:
- Create a folder
artin your user folder - Create a folder
postfxinside theartfolder - Move your file into
postfxfolder- Example:
0.33/art/postfx/mycorrection.png
- Example:
- Create a folder
The color ramp size must be 256×1. PNG format is recommended.

Last modified:
August 25, 2025
Was this article helpful?


